Expo in a monorepo
Published on
An Expo application can not be integrated inside a monorepo without doing some extra work. Fortunately the Expo team has published some tools to ease our job.
Warning
Since the date of writing of this article, Expo has evolved and there is now a simpler way to set it up inside a monorepo. I recommend reading the official documentation about monorepos.
Today I encountered some difficulties to make Expo work inside a monorepo.
As part of my studies I have to create a mobile application to listen to music in collaboration with other people. We decided to create it with React Native, and to ease the development, we decided to use Expo. We also decided to organize our project by packages, owned by a single repository. To orchestrate these different packages, we chose to use Yarn Workspaces and Lerna.
With monorepositories, the node_modules are shared across all of the packages by default, and are stored at a single place, at the root of the monorepo. If a package needs a different version than others, it will be installed inside the node_modules directory of this package.
In general this is perfectly fine. It even reduces your disk usage, comparing to a situation where all the packages would be in different repositories, each having its own independent node_modules folders.
However this genius way of managing multiple independent but interlinked pieces of code can become a headache when a tool needs to find a file exactly inside the node_modules directory of a package. And guess what? This is the case of Expo.
There are several ways of solving this problem. The easiest one is to disable the mechanism I described before, namely having the dependencies installed at the root of the monorepo and letting Node.js travel directories parent to parent to find the code of the dependency. This mechanism is called hoisting, as one of the properties of functions in JavaScript. We can disable hoisting by listing with globs all the dependencies we want to be installed directly in the package node_modules and not on the root node_modules directory in the package.json of the package, like that:
json
From my short experience with monorepos, it works great. But it can also be a bit annoying as you have to list explicitly the dependencies that do not work when hoisted.
For Expo, there is another option, the official one. Let’s see how we can have an Expo application run correctly inside a monorepo.
permalinkSet up a simple monorepo
Let’s create a simple monorepo first. I expect you to have created a Git repository.
Create a package.json file with the following content:
json
Then create a directory called packages and inside it, let’s create our first package named utils. It will contain some utility functions and constants.
And create a package.json for this package, so put the following content inside packages/utils/package.json:
json
Now that we have a package, let’s add it the the list of workspaces in package.json file at the root of the repository:
diff
We can also use a wildcard instead of manually listing all the packages:
diff
Now let’s create an index.js file for utils package.
jsx
It contains a function that converts an amount of hours to minutes. It basically multiplies the hours amount by 60. It exports this function with the same name.
Now let’s see if we can add another package to test that hoursToMinutes function can be used from the outside.
Create a new directory in packages directory called calculator. Give it a package.json with the following content:
json
And now write a program to get the number of minutes in 2 hours, using the function hoursToMinutes defined in @expo-monorepo-demo/utils:
packages/calculator/index.js:
jsx
If you run this file, as is, you should see an error like this one:
txt
Node.js tells us that it could not find a dependency called @expo-monorepo-demo/utils in any node_modules directory, from packages/calculator/node_modules to your home.
To install our own package we have to go to packages/calculator/package.json and add @expo-monorepo-demo/utils as a dependency:
diff
The star means we do not care of the semver version, we just want the code that the package utils currently contains.
Now go to the root of the monorepo, and run in a terminal:
bash
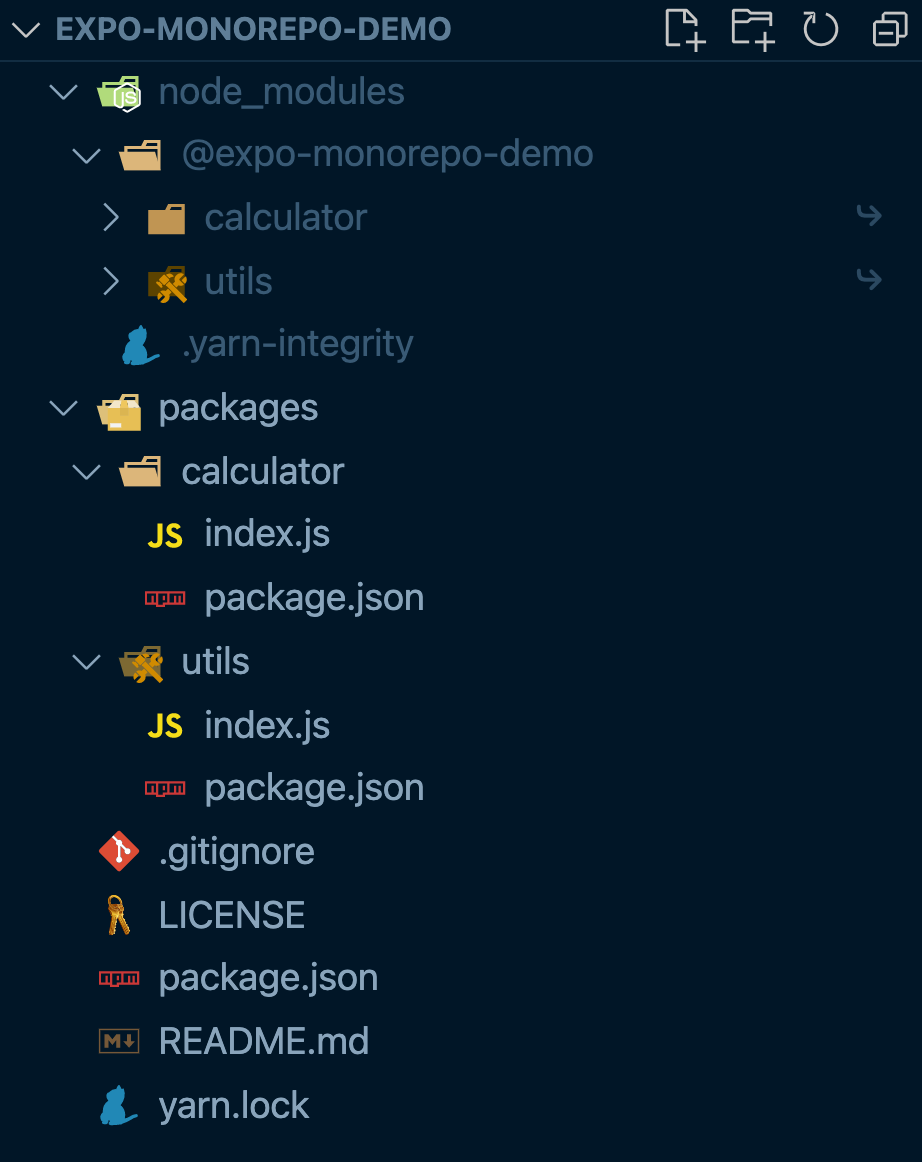
It will install the dependencies, and in the case of a monorepo, it will also create a symbolic link from packages to the root node_modules, as you can see in the following image:
Now if you run again the index.js file in calculator package, you should see the expected result:

Tada 🎉! We have a working simple monorepo architecture.
Now, let’s create an Expo application.
permalinkCreate an Expo application as a package
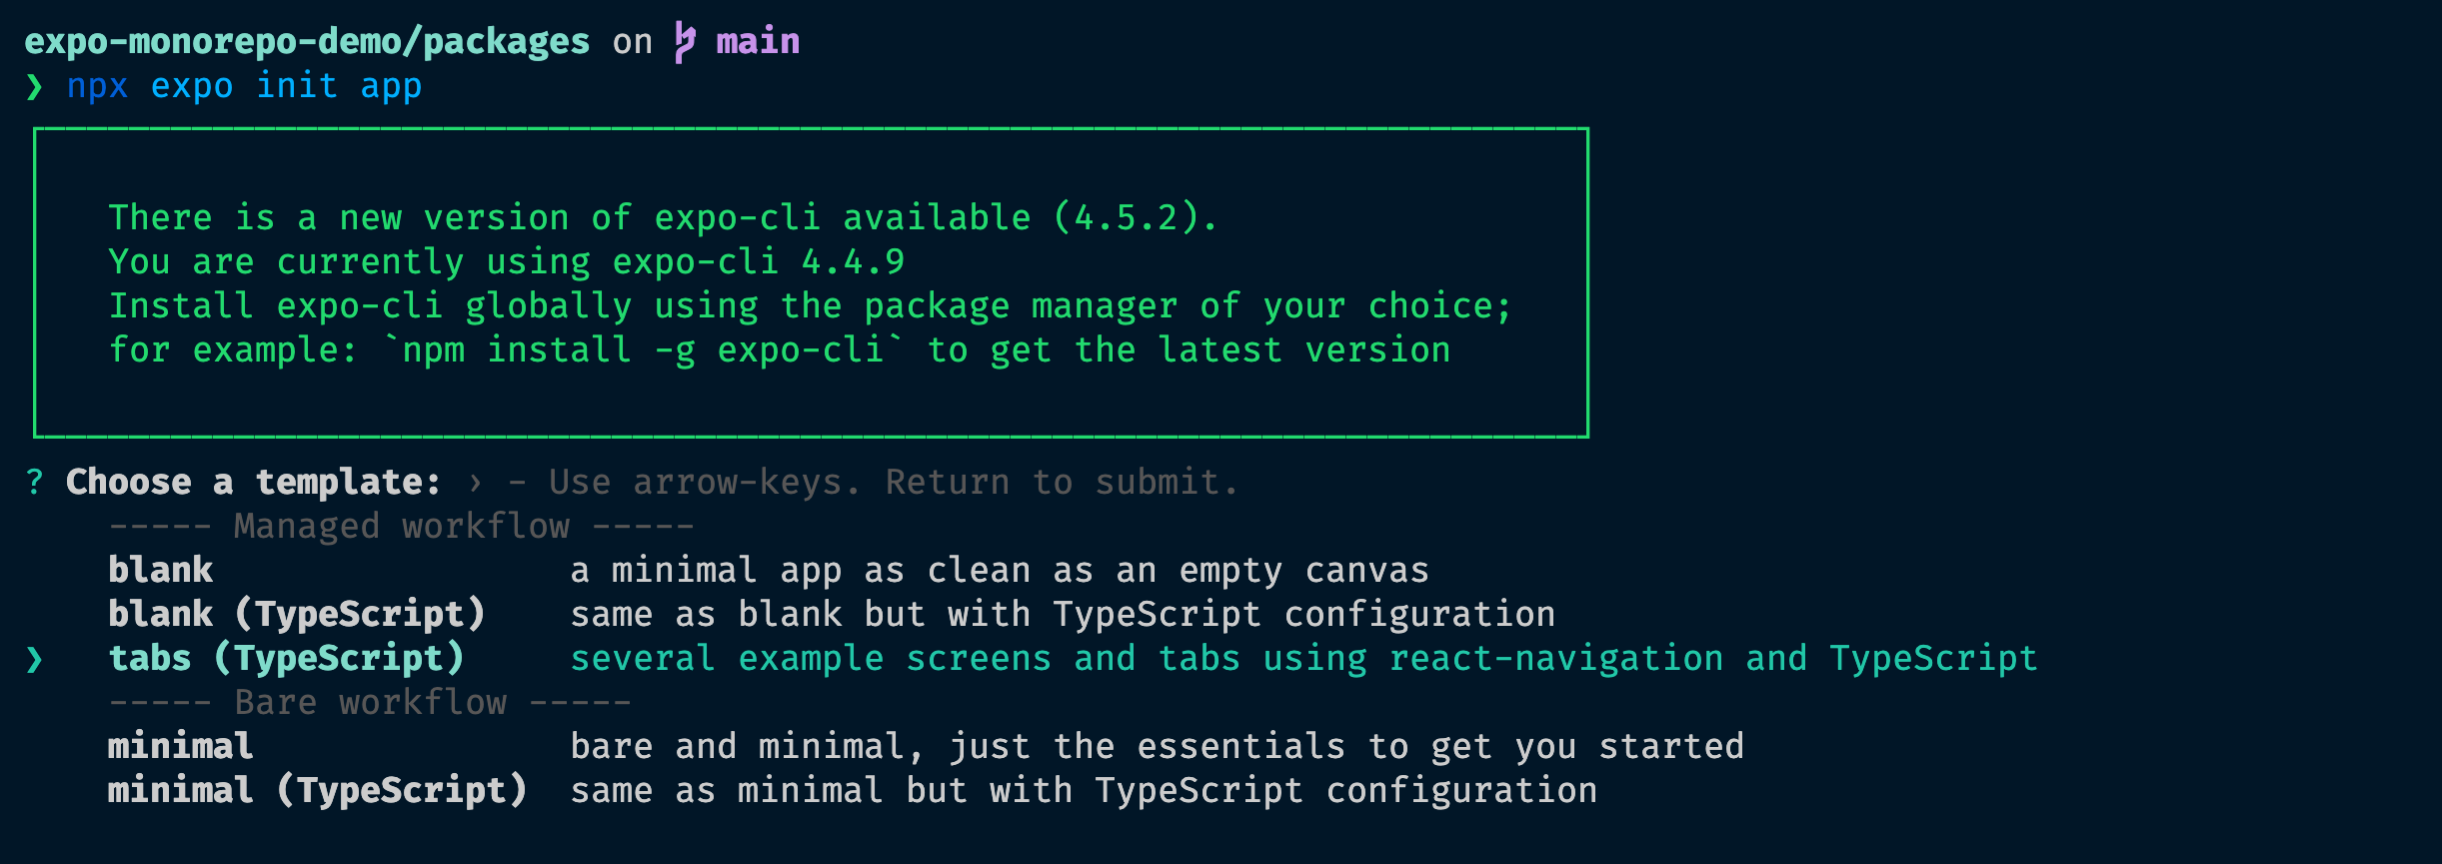
Go to packages directory and run in a shell:
bash
Go to packages/app/package.json and set the name of the package to @expo-monorepo-demo/app.
Set also the version to 0.0.0.
Be sure to have private property set to true.
You must have a package.json as follows:
json
Now go to the root of the monorepo and run:
bash
It will install the dependencies of our Expo application.
Two things to note.
If you watch carefully, a node_modules directory has appeared in the app package. It contains a unique directory, called .bin, that contains several binaries. It contains all the binaries that are brought by the dependencies listed in app/package.json, such as Jest.
Secondly, we can see that the top level node_modules has been filled with a lot of packages. This is a good sign that dependencies have been installed correctly!
Now that we installed the dependencies, let’s try to run our Expo app. If you have never done that before, our expectation is to be able to launch a simulator, that shows a demonstration application.
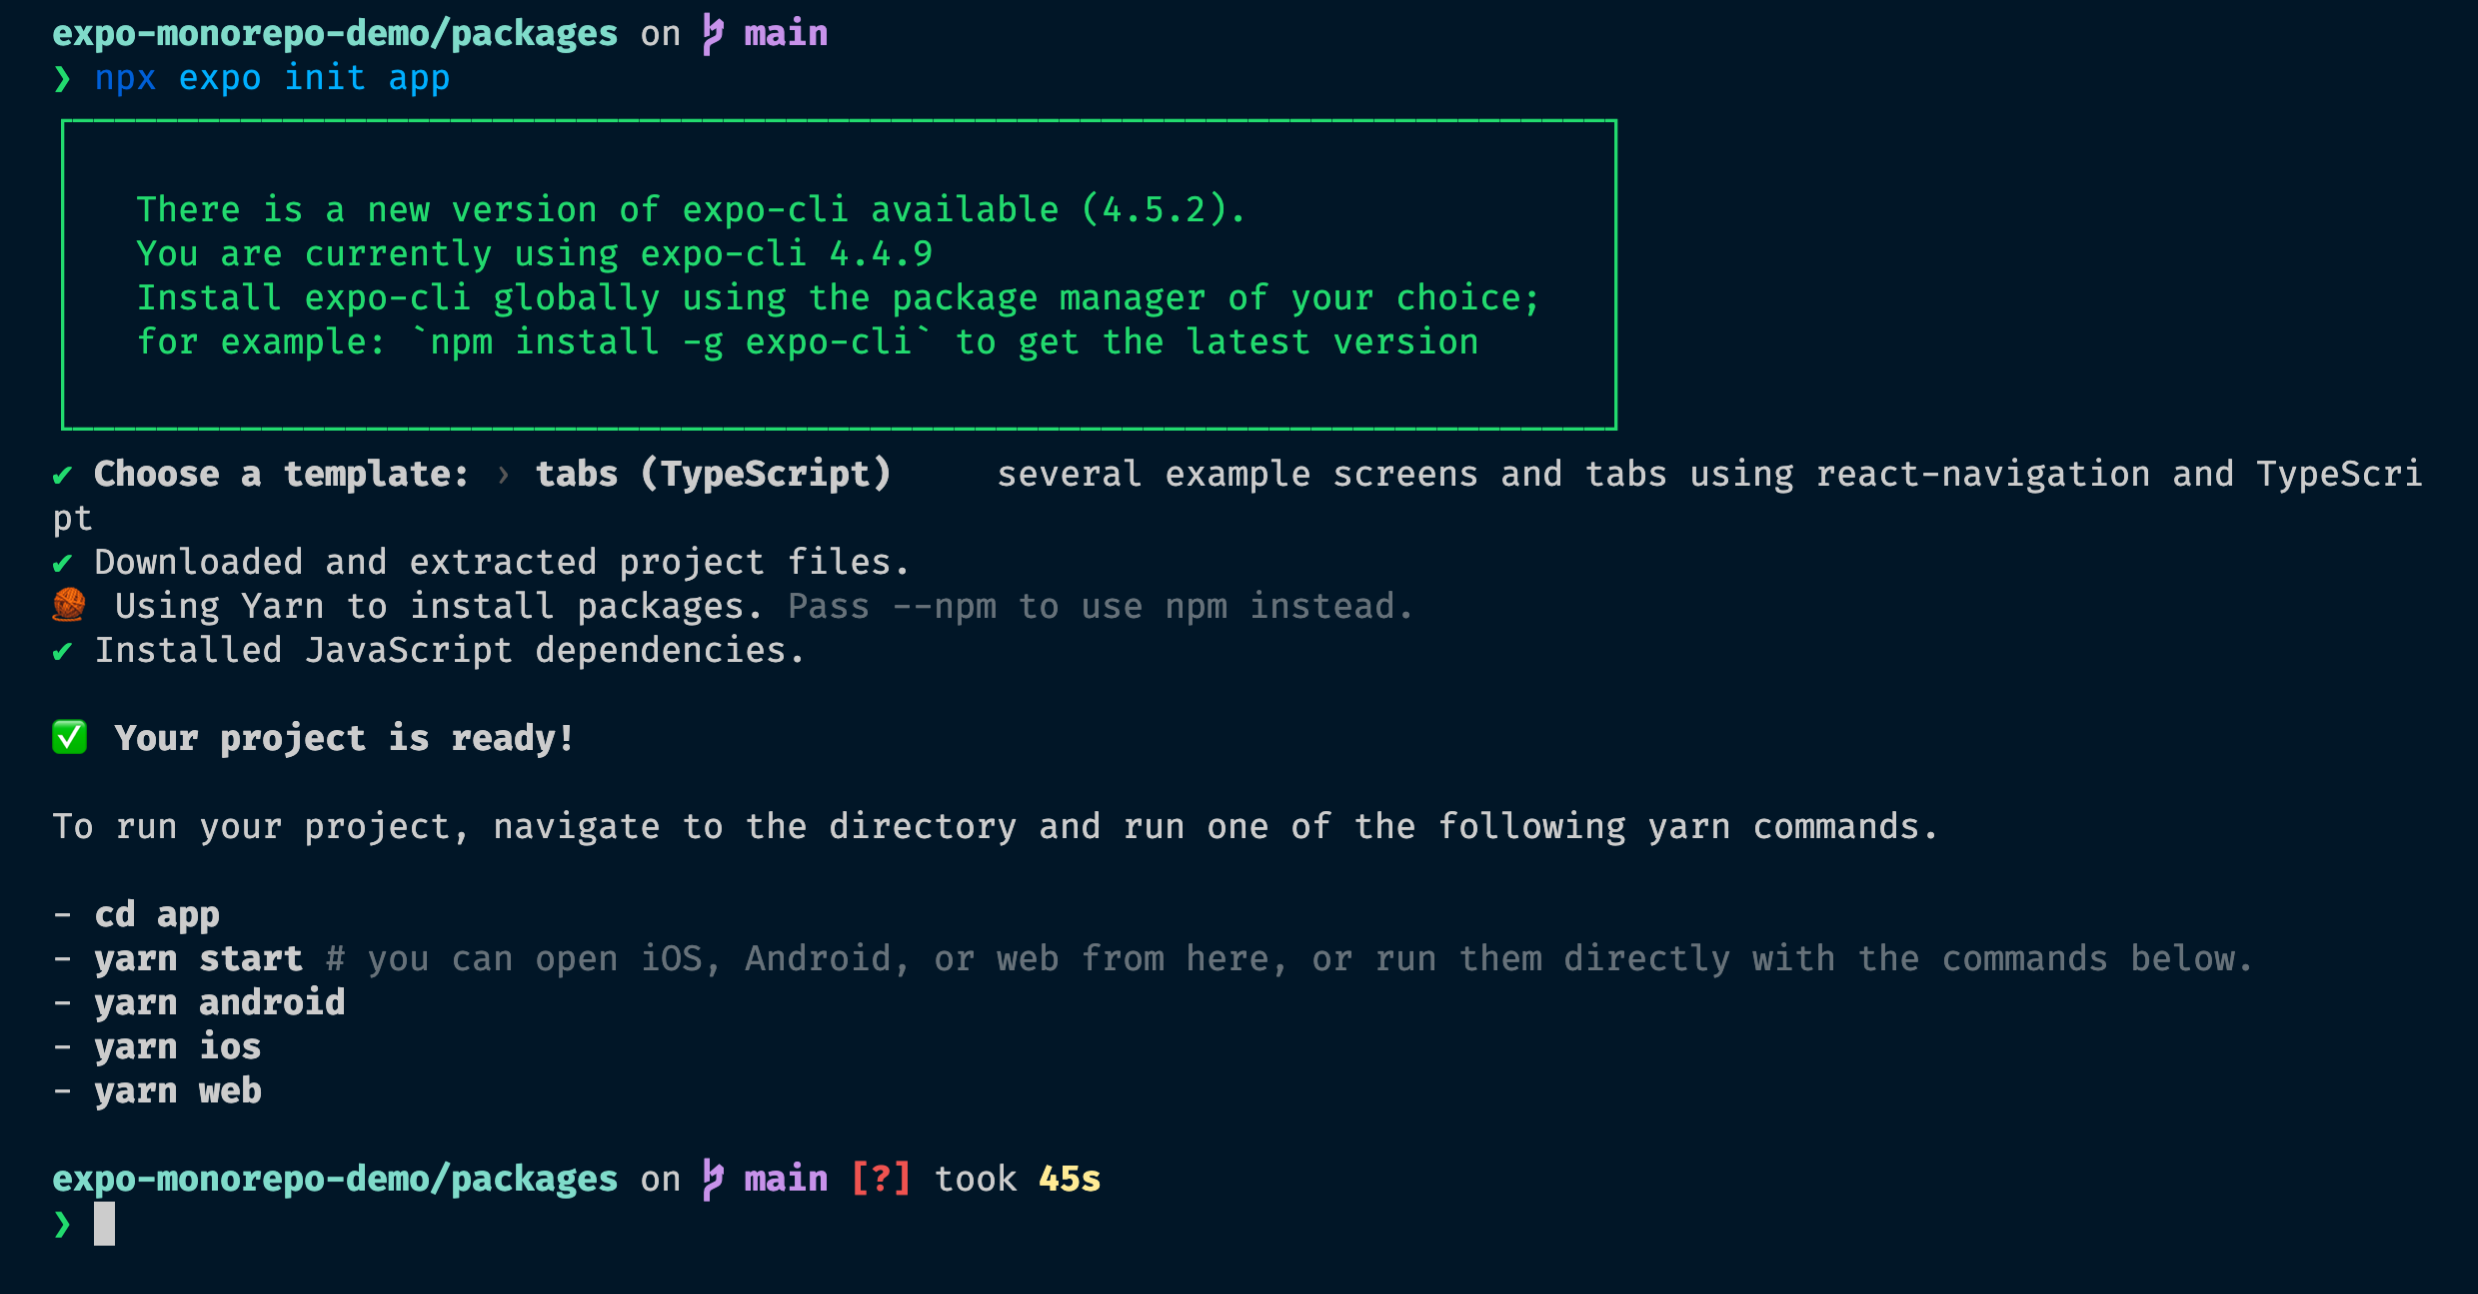
So let’s run yarn start inside our app package.
You should see something similar to the following screenshot:
Let’s press a or i, according to which simulator you want to launch.
Expo will try to bundle the application and launch it in the simulator, but it will fail.
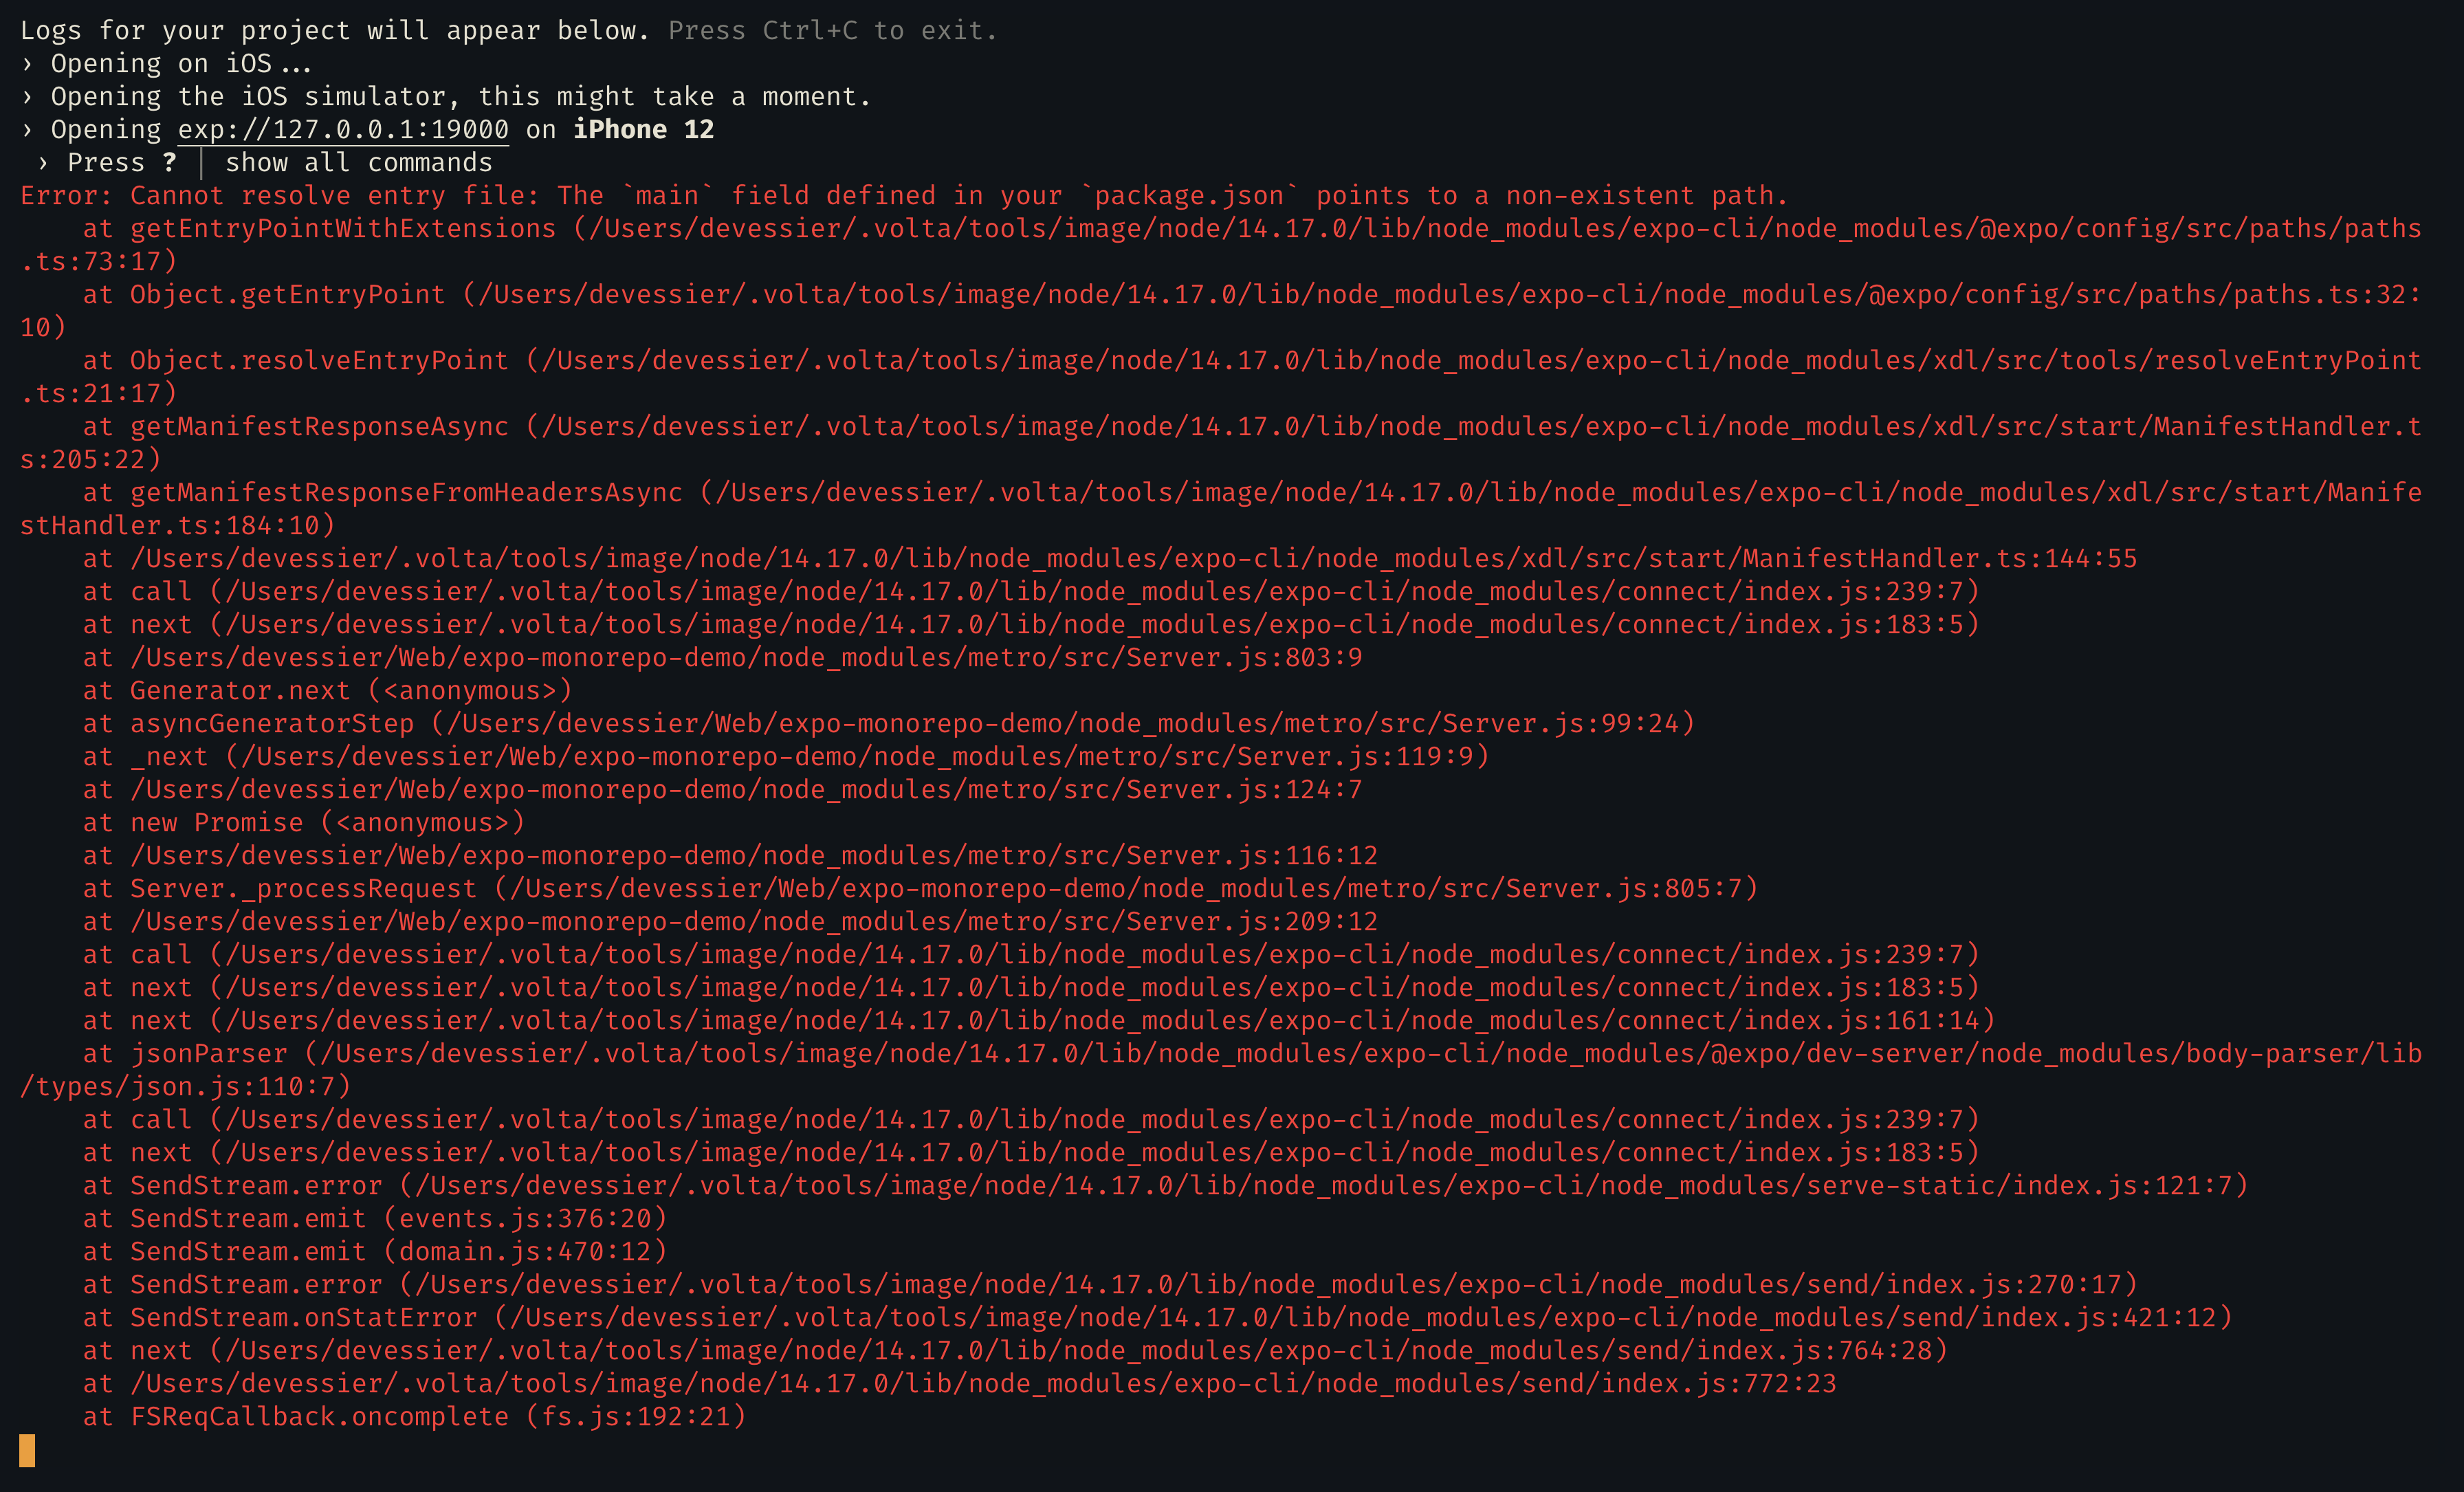
Expo tells us that the main field defined in our package.json does not point to an existing file.
The value of the main field is node_modules/expo/AppEntry.js. And indeed, there is not such a file in the package app.
Let’s find a solution to our problem 🕵️
permalinkSolve Expo in a monorepo issue
The issue can be easily solved by following the official instructions given by the Expo team. We will see how to implement them in practice in our demo monorepo.
permalinkInstall expo-yarn-workspaces
Let’s install expo-yarn-workspaces as a dev dependency to the app package:
bash
Now let’s set a postinstall script to the app package.
json
This script will do two things:
- It creates symlinks for
react-nativeandexpo, from thenode_modulesofapppackage to the rootnode_modulesdirectory. - It generates a new entry point for our application. This entry point was previously
node_modules/expo/AppEntry.js. The entry point is referenced in thepackage.jsonby themainproperty and is used by Expo.
Now we must trigger the postinstall script by regenerating our dependencies.
Go to the root of our monorepo and run the following commands:
bash
Now we need to change the reference to the entry point file in the package.json. The reference is defined by the main property.
json
We also need to ensure that Git will not track this autogenerated file. For that, we update the .gitignore file at the root of app package:
txt
permalinkCustom Metro configuration
Next we must create a custom config for Metro, that is capable of understanding our monorepo architecture.
Metro is the bundler for React Native that compiles our React code to native code.
Let’s create a file named metro.config.js at the root of app package:
jsx
Thanks to this custom configuration, Metro will now resolve dependencies from the top node_modules directory and also the symlinked packages, that is the other packages of our monorepo.
It’s time to see if our Expo application now works with all the modifications we brought.
To be sure that Metro uses our custom configuration instead of the default one, we must provide the clear argument to expo start. It will clear Metro cache. Let’s run:
bash
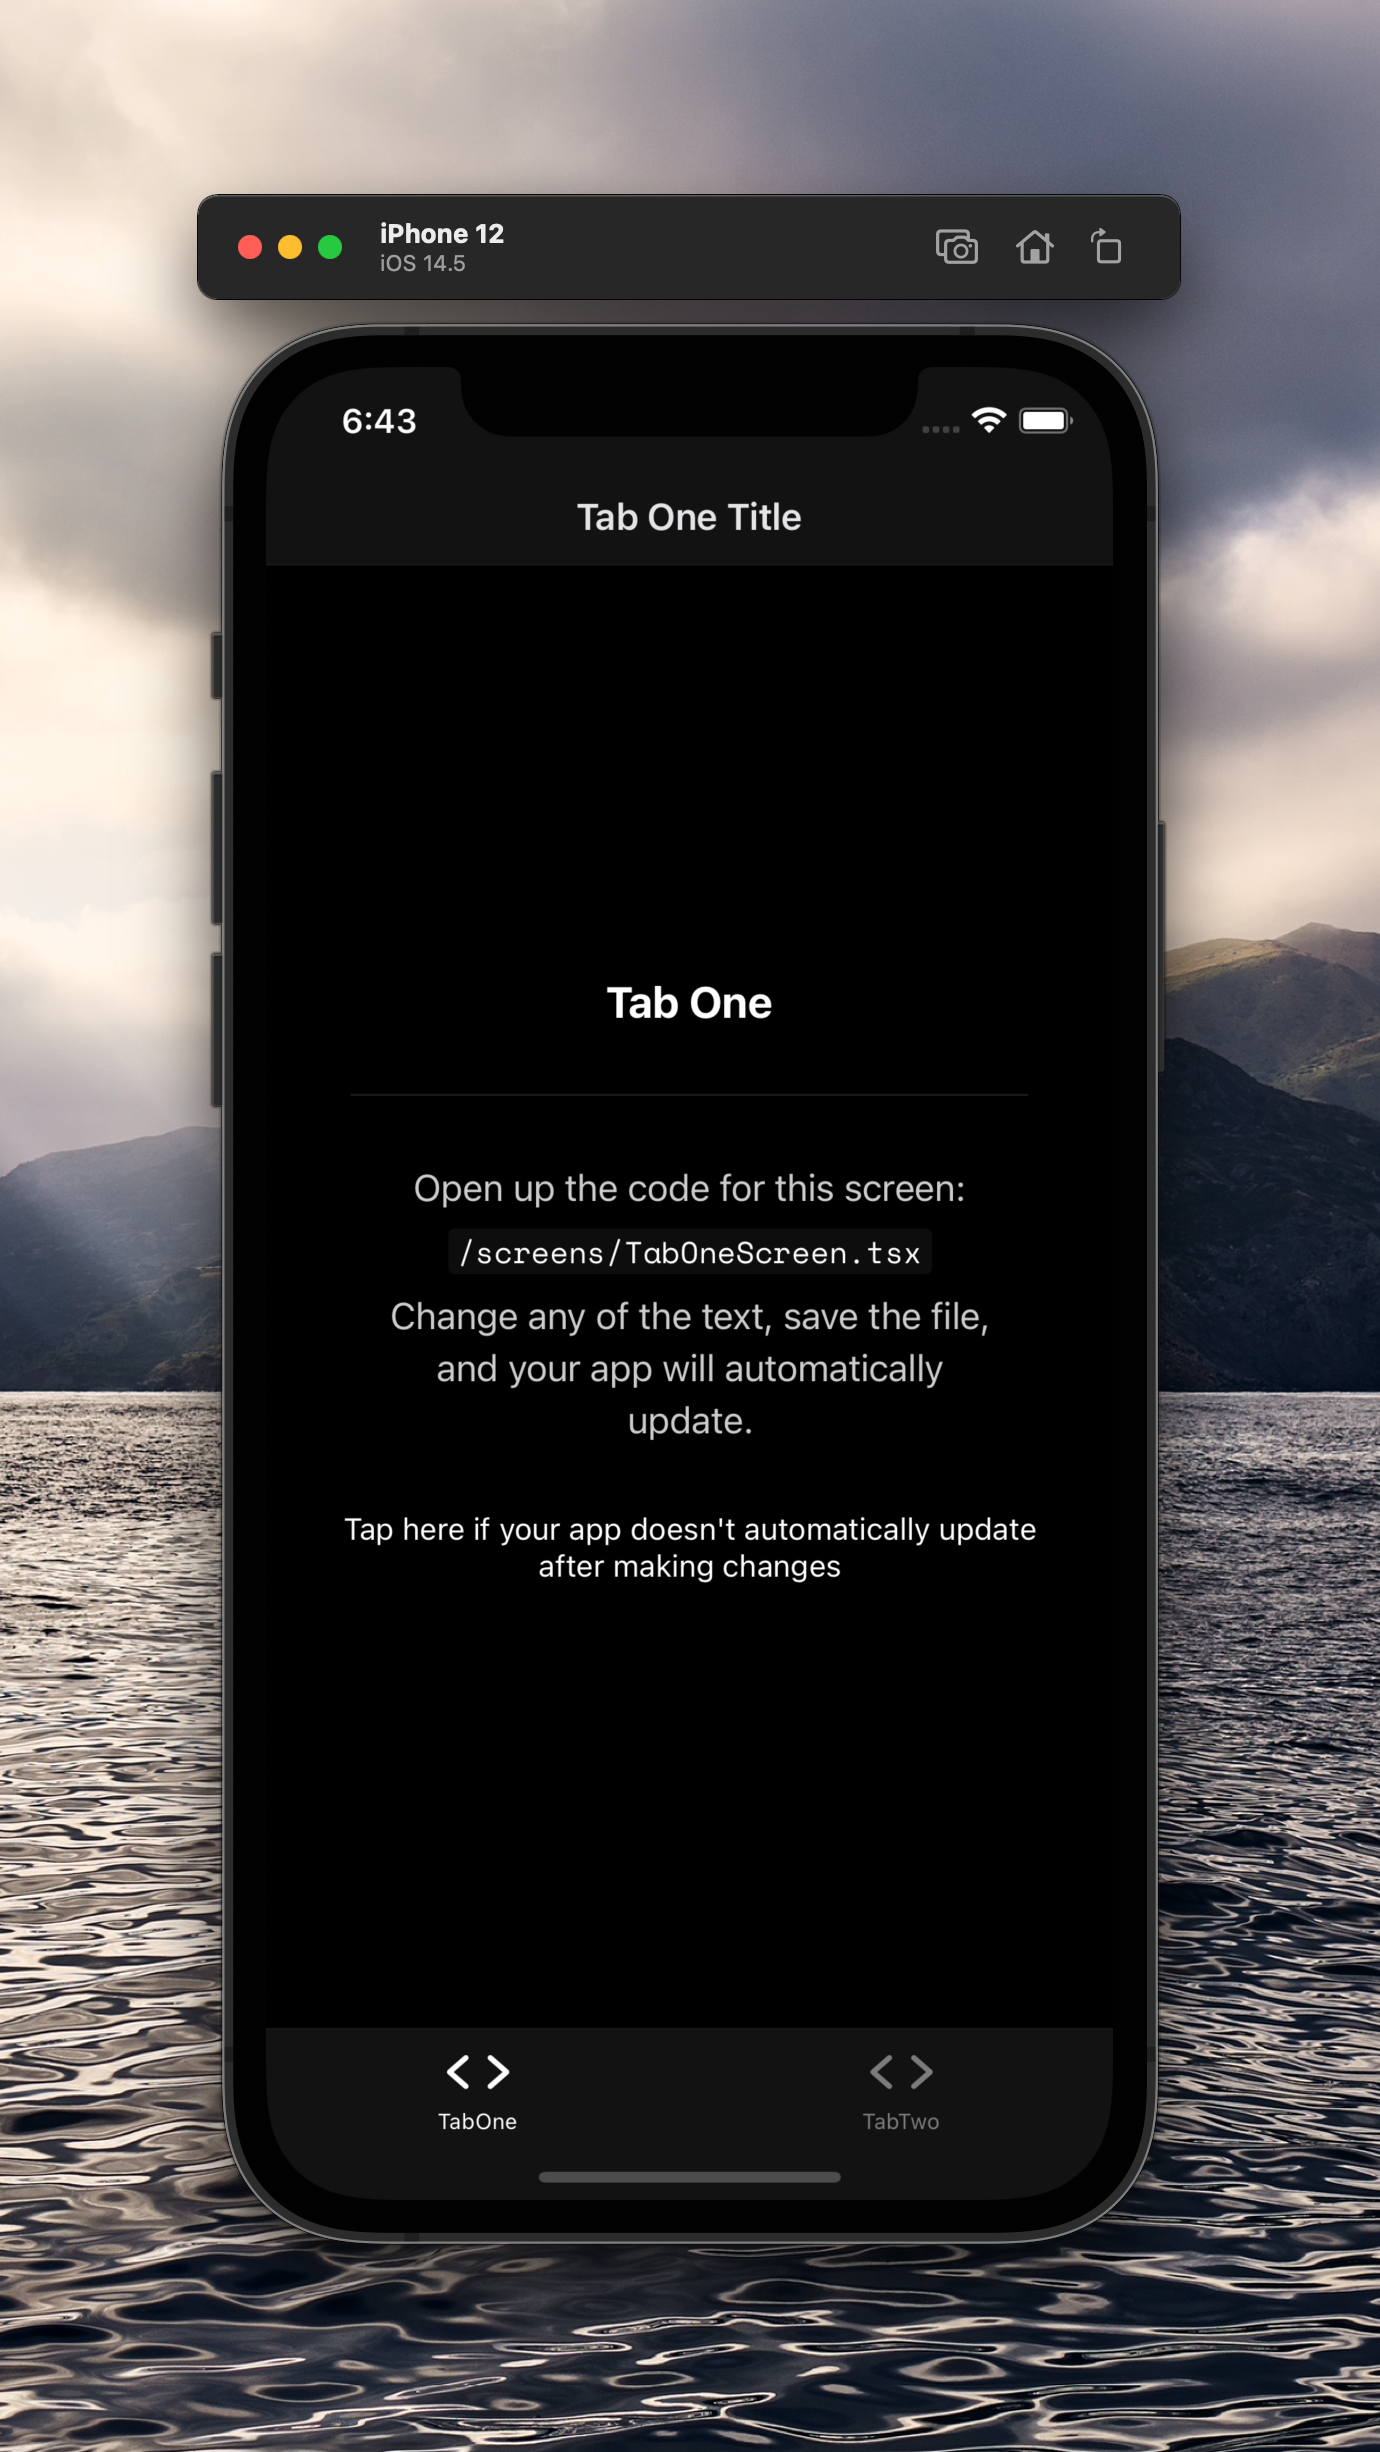
Now when we launch the Android or the iOS simulator, we see that the application is compiled correctly and that the simulator is effectively opened 🎉.

permalinkBonus: Configuring Expo for Web to work with a monorepo
If you plan to build an application with React Native that also runs on the Web, you will probably find this extra step interesting.
We need to create a custom configuration for Webpack. We add the following content to webpack.config.js:
js
The configuration of Webpack can be extended however you want from this point.
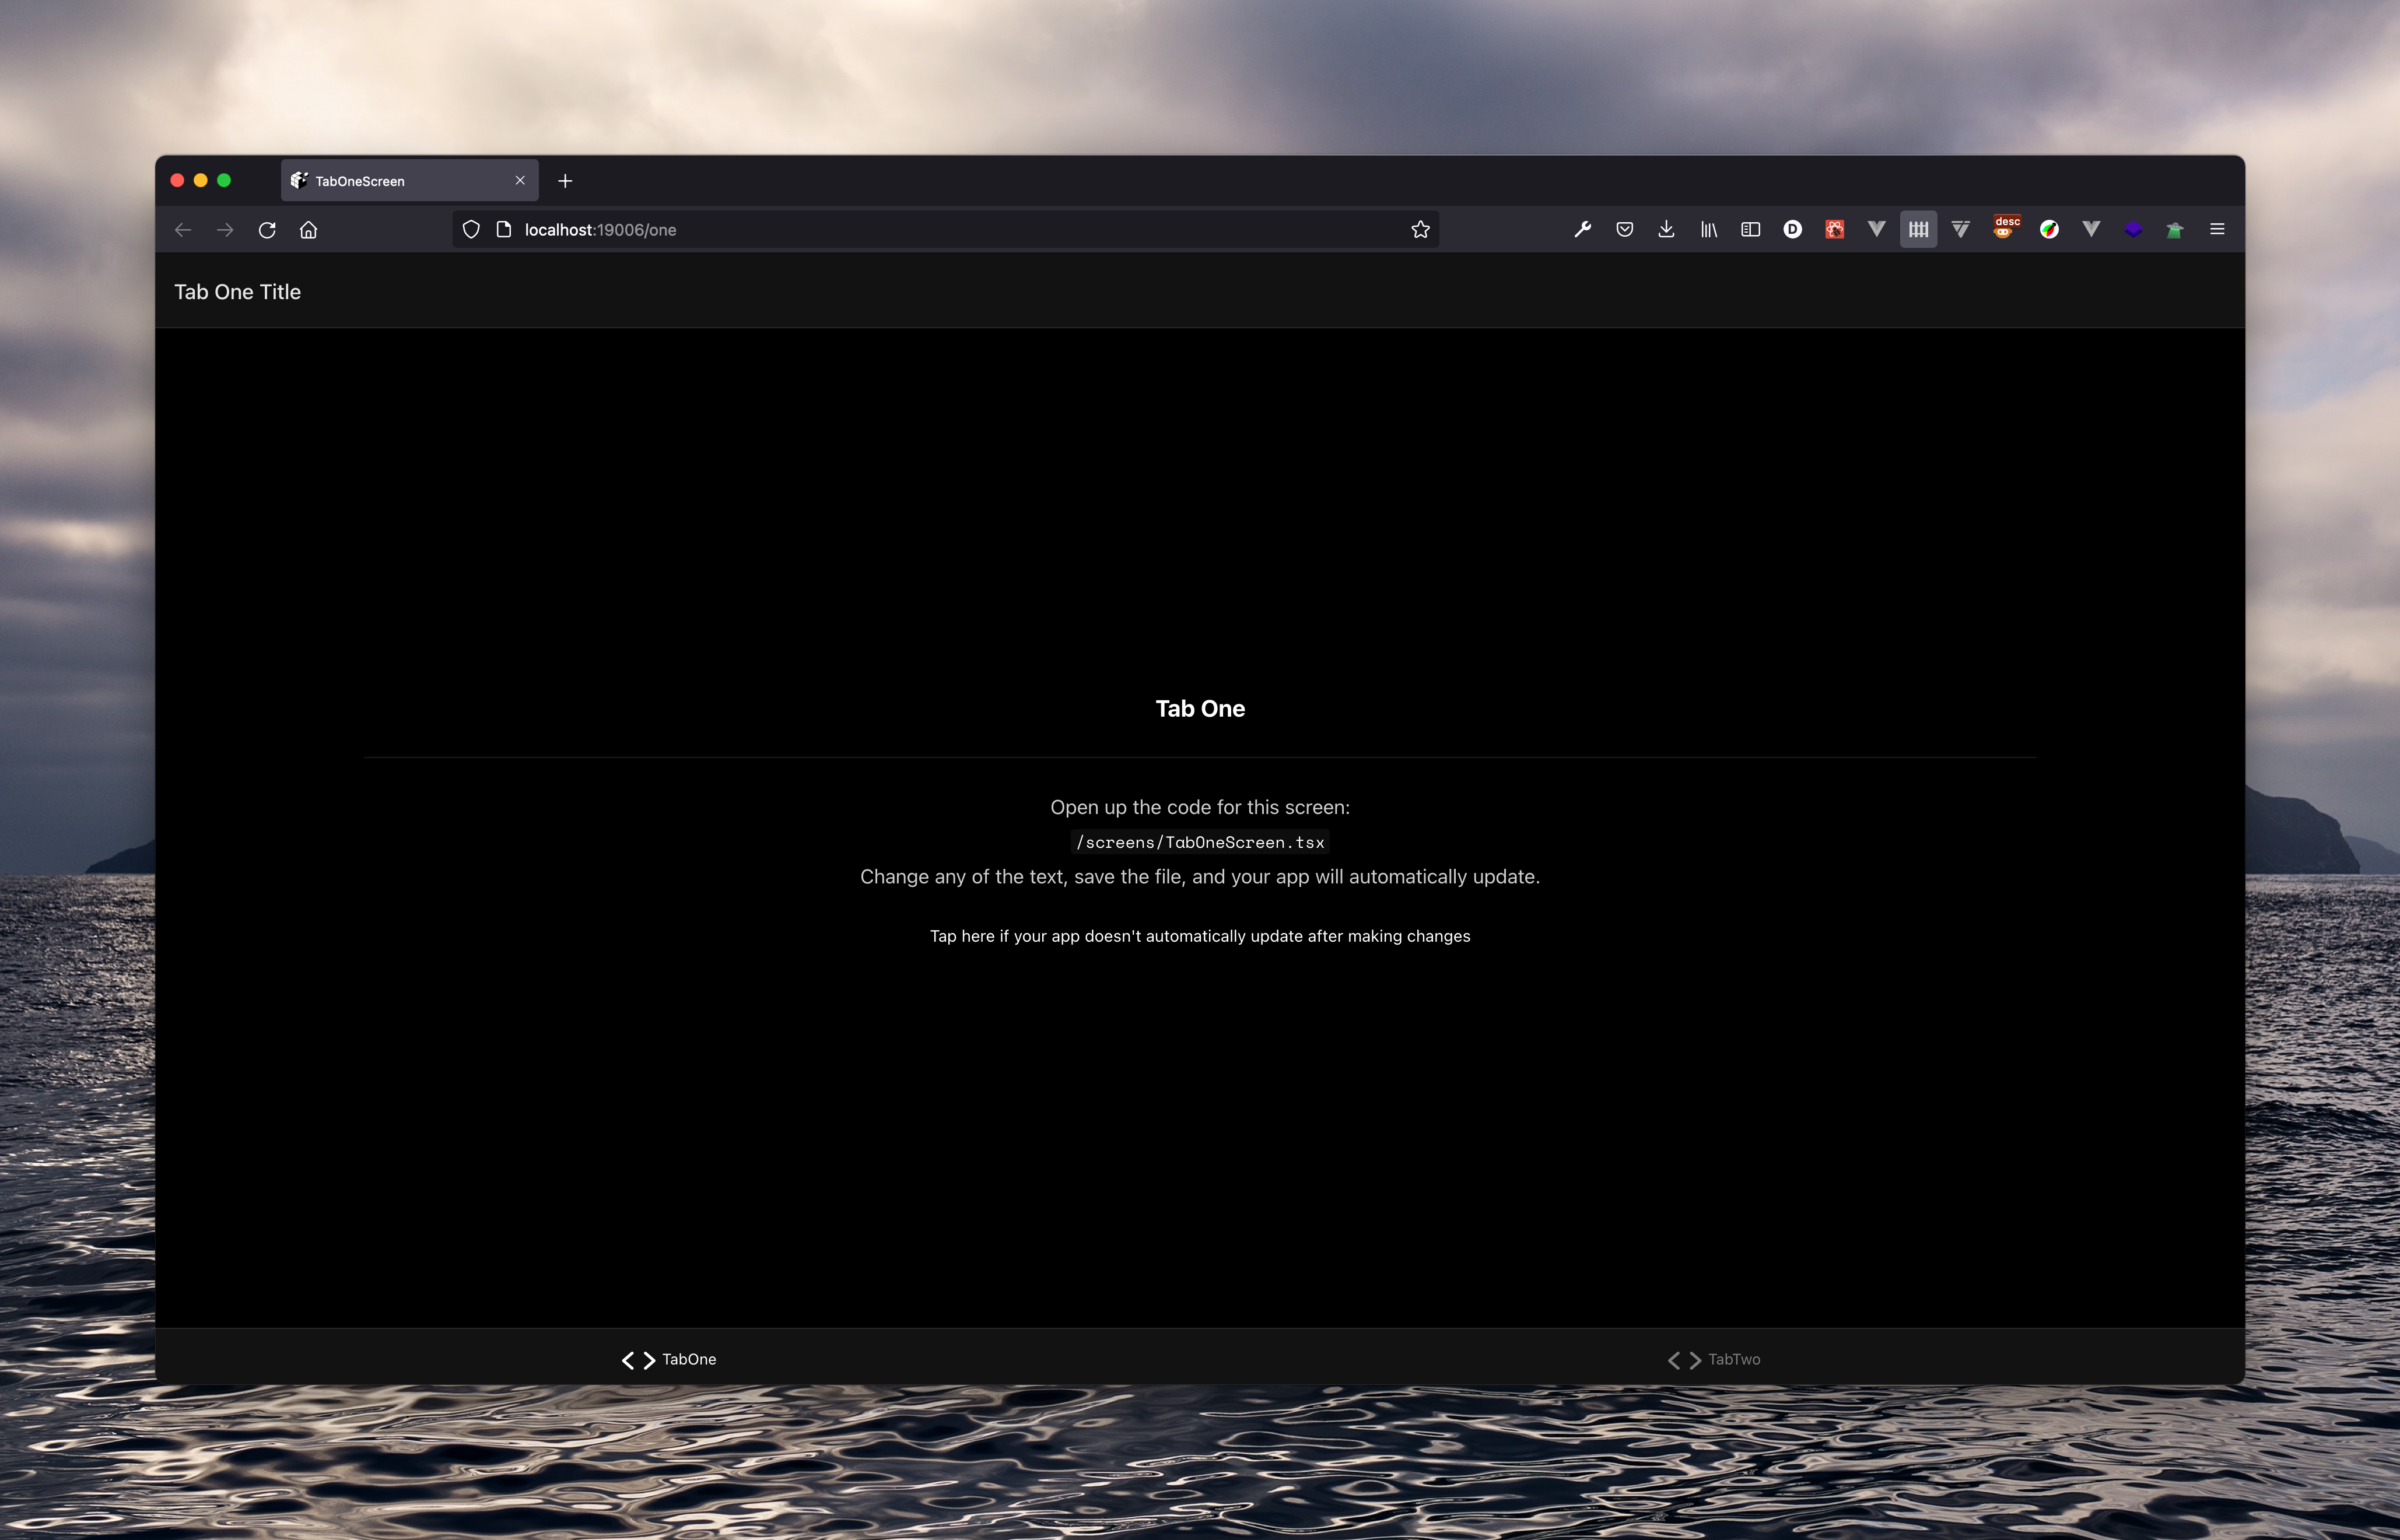
If we launch the Web version of our test Expo application we see the application running in the browser. And I find that fantastic.
permalinkConclusion
Expo and React Native really impress me. It is so easy to create a multi-platform application with the same codebase. The thing that fascinates me the most is the code generated for the Web: it’s only div, span and img but everything is accessible by default, thanks to all the correct ARIA attributes being specified and the event handlers being registered to simulate the behaviour of a native button element, for example.
It can be a bit disappointing to see that by default Expo can not be used in a monorepo, but once you find the official documentation about this issue, you are good to go.
Have fun with Expo and see you soon!
permalinkReference Github repository
You can find a repository with all the steps I described in this article done on Github: https://github.com/Devessier/expo-monorepo-demo