Create stale data indicator with XState
Published on
The are few things as boring as not knowing the state of an application. Is this document saved or should I Ctrl+S? In this article I present the stale data indicator we display on our Turing machine visualizer when visualizer is not in sync with inputs.
This article is the fourth one of a series about our Turing machine visualizer built with XState .
This is the feature I’m the most proud of, while it was one of the simplest to implement. But it gives the visualizer a more professional look.
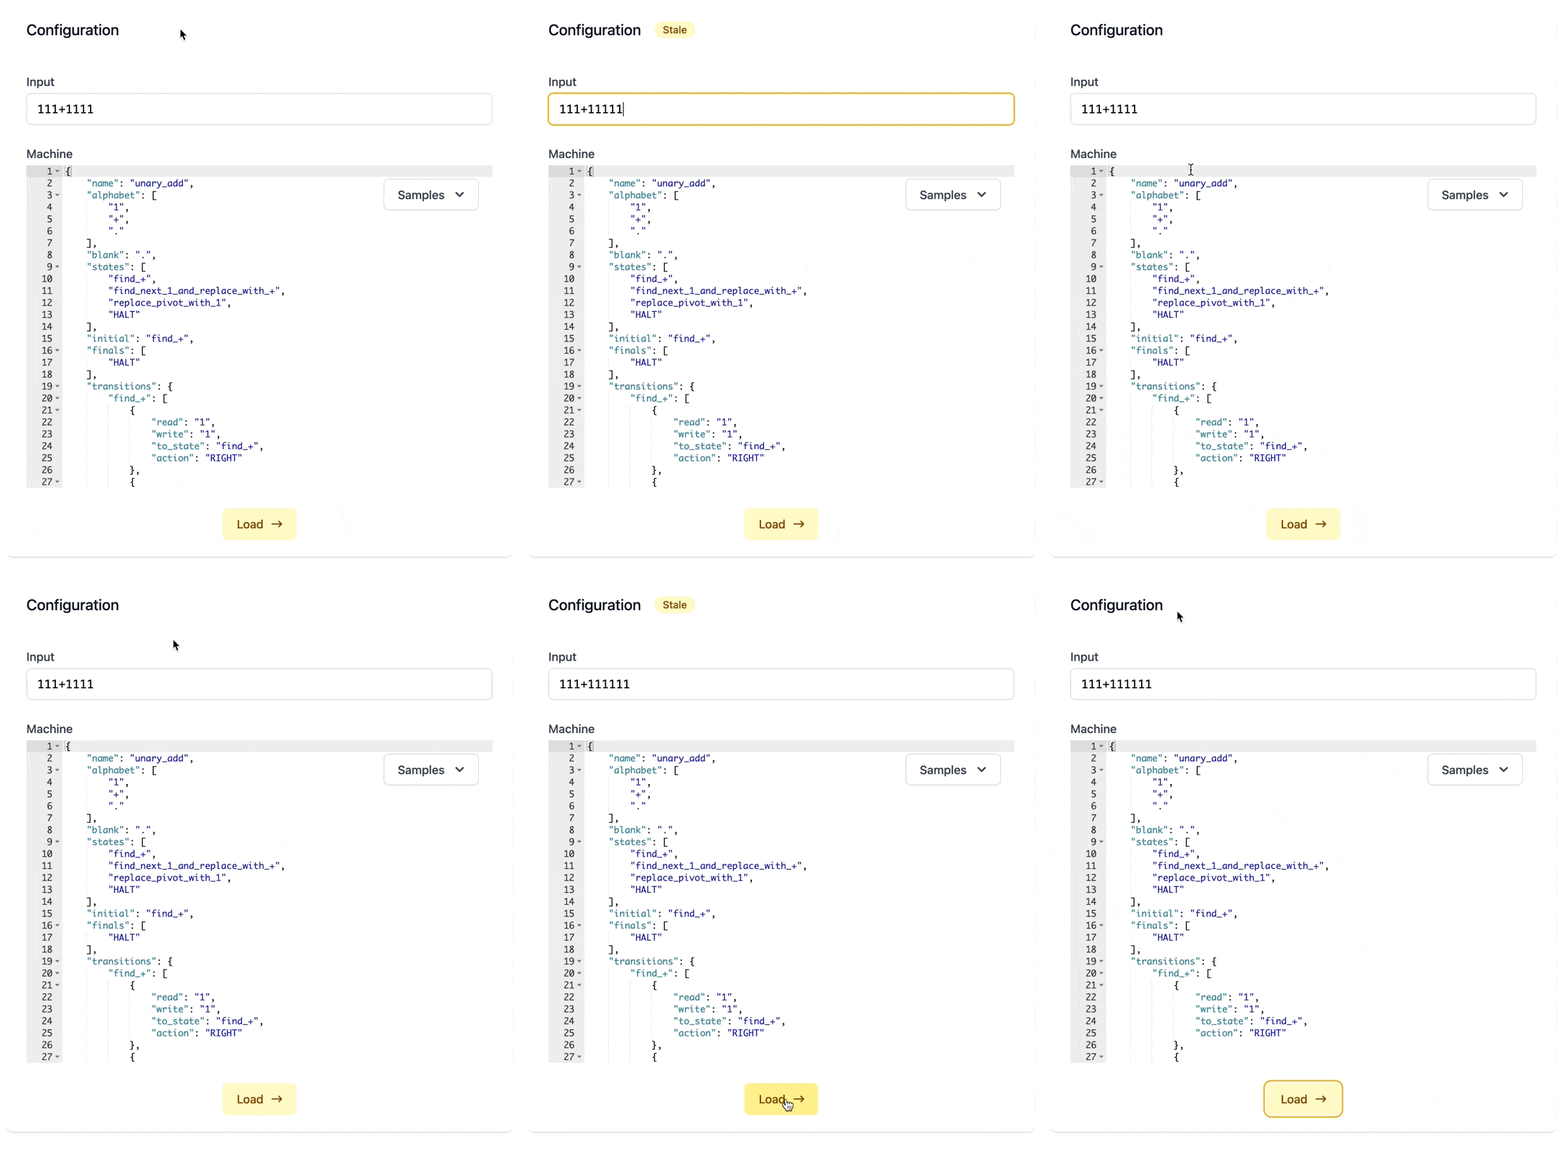
When input or machine configuration are different from the last input and machine configuration that led to a successful execution, we indicate that inputs are stale:

To implement this, first we need to cache the previous input and machine configuration when we receive a successful execution result:
ts
Received response state is entered when the server responds with a successful execution result. When this state is entered, we cache the input and machine code into the context.
We implemented the request to the server in a previous article.
Then in Vue side, we create a computed property:
ts
If no successful execution has been performed yet, cached values are undefined, and data are not stale. Otherwise, we compare values with the cached ones and return true if at least one of input and machineCode is different from its corresponding cached value.
If you are coming from React world, a computed property is like a useMemo.
The computed property is then used to dynamically display the stale indicator (and apply a transition!):
svelte
This is a stylistic detail, but it greatly improves the UX. Furthermore, it is not so hard to implement technically.
permalinkSummary
We saw that not every piece of logic has to be decided by XState. We picked values from machine context to compute some logic in Vue side. XState orchestrates, and view layer derives from XState.
So that’s the fourth article of the series about Turing machine visualizer showcase! The last article will be released soon.
We’ll talk about the Load button of the visualizer, and precisely about the way we animate it.
You can already try the load button by executing a machine.
The code of the visualizer is on GitHub.
The series contains the following articles:
- Control tape of Turing machine visualizer with XState
- Orchestrate request for server-side execution of Turing machine with XState
- Prevent flickering loading animation with XState
- Create stale data indicator with XState
- Create a proxy state machine to drive CSS transitions on state changes with XState